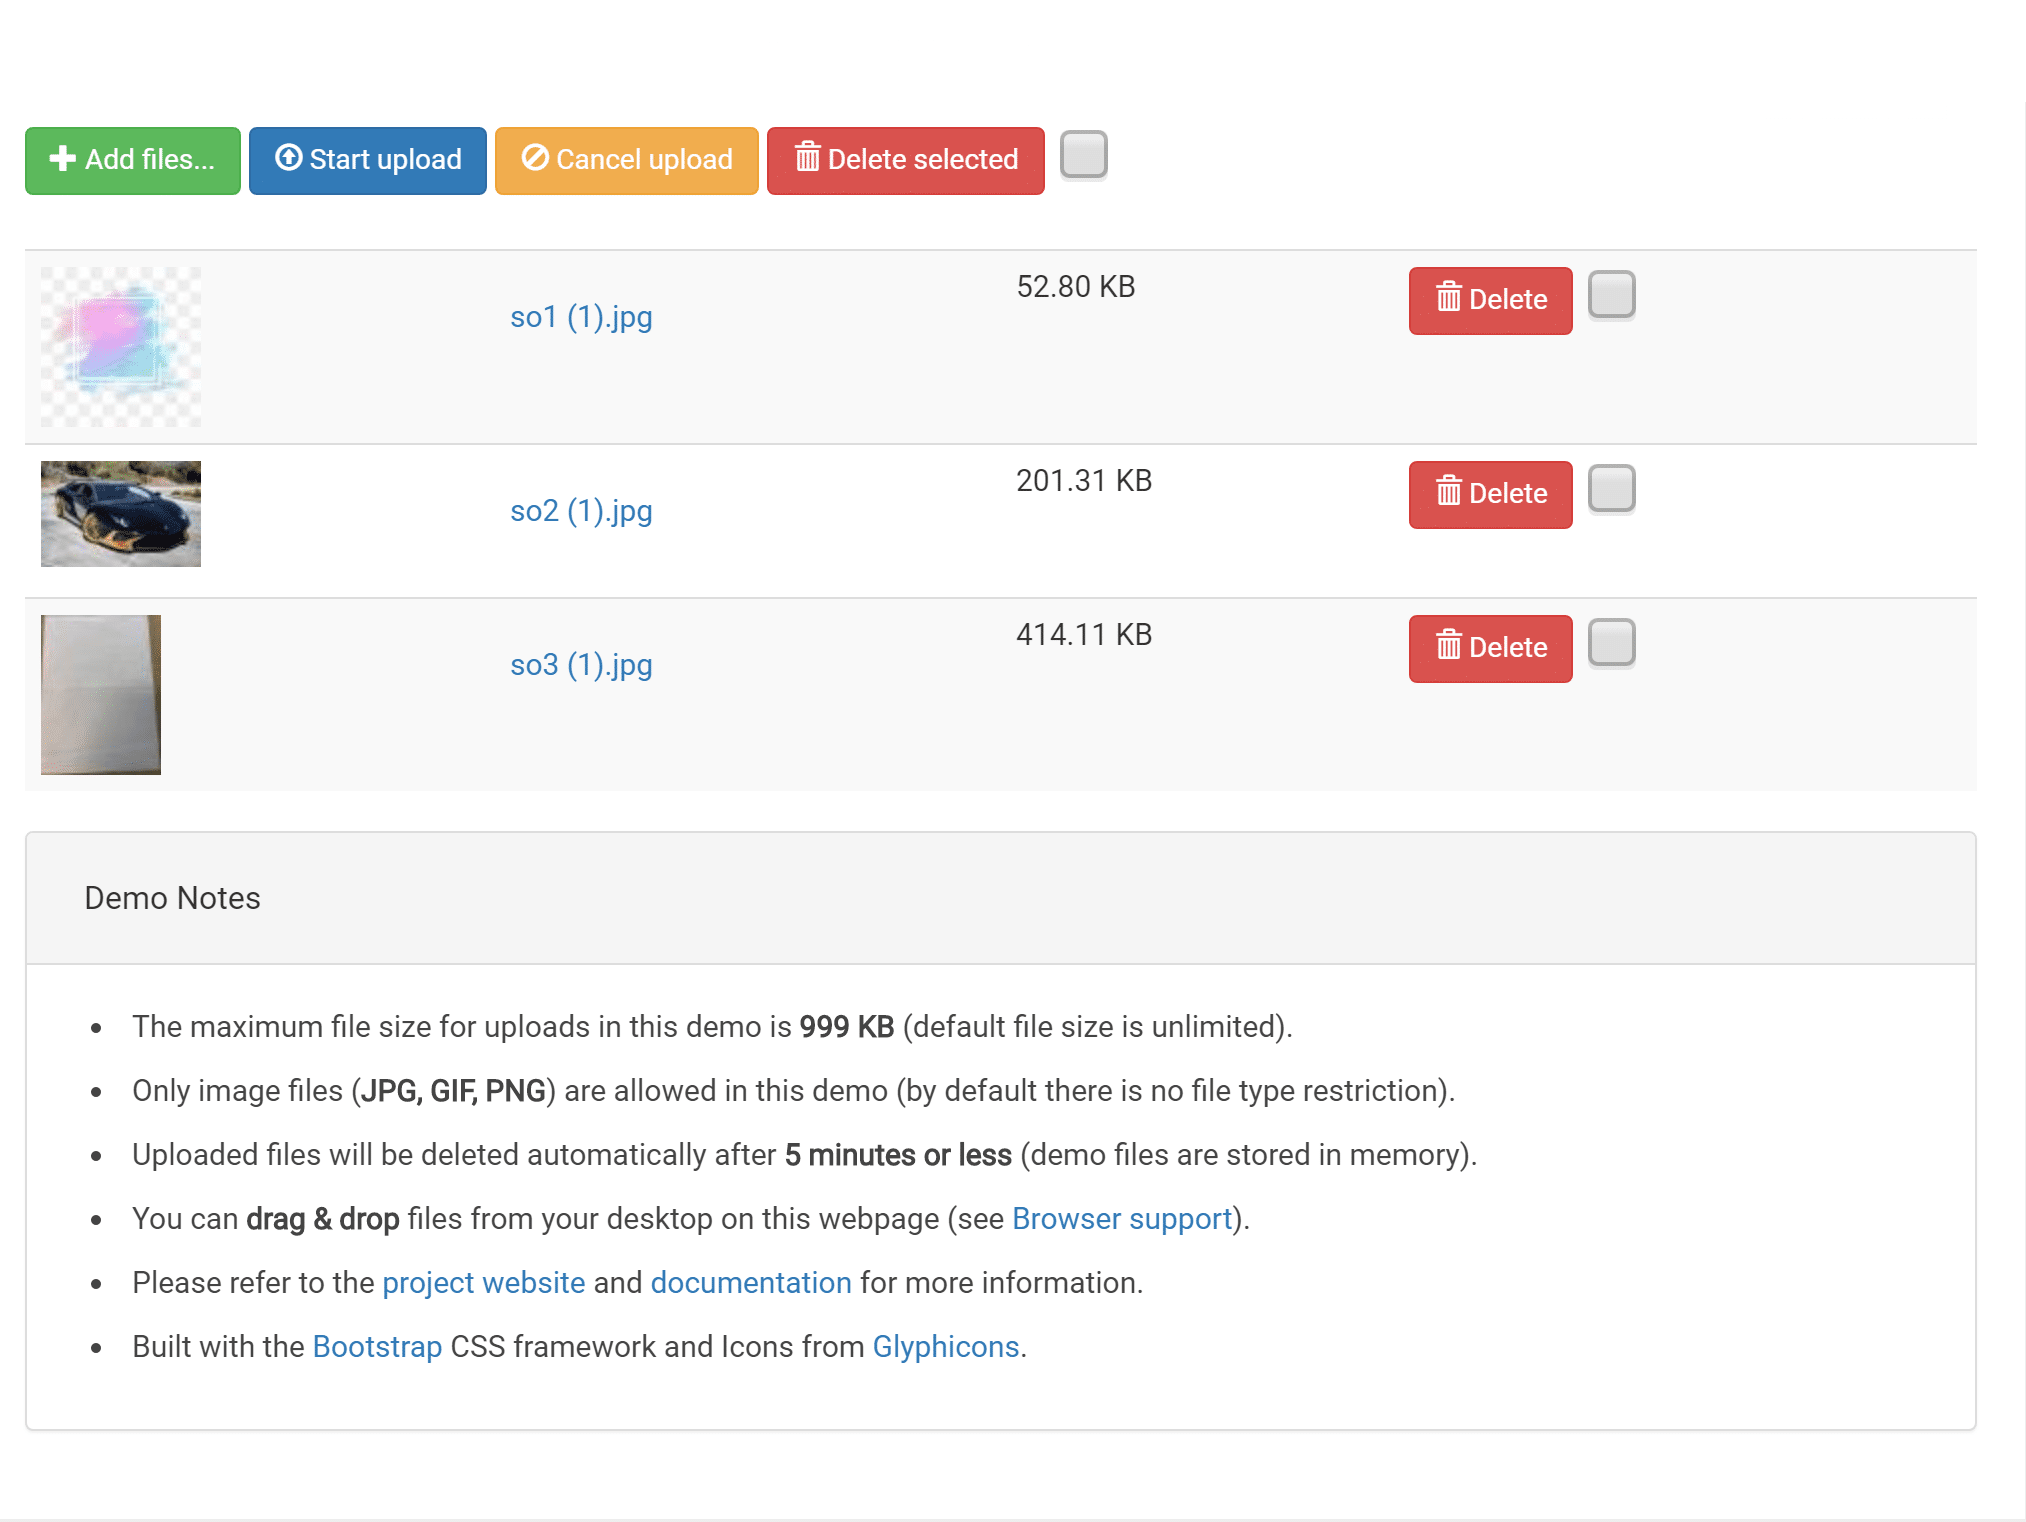
The “File Upload” is a well developed, cross-browser, cross-platform and powerful rich file uploader plugin for jQuery. It helps you to create jQuery based multiple file upload with progress bar and preview. It supports drag & drop, validation, images preview, audio and video files.
Moreover, the plugin also supports cross-domain, chunked and resumable file uploads. It works with any server-side platform like PHP, Ruby on Rails, Google App Engine, Java and Python etc.
Plugin Overview and Preview
| Plugin: | jQuery-File-Upload |
| Author: | Sebastian Tschan | Category: | Text & Input |
| Published: | January 19, 2024 |
| File Type: | zip archive (HTML, CSS & JavaScript ) |
| Package Size: | File not found! |
| Dependencies: | jQuery 1.3.1 or Latest version and Bootstrap 4.1.3 |

How to Create Multiple File Upload with Progress Bar
1. Load the jQuery, Bootstrap framework and other dependencies into your HTML document to getting started with this file upload plugin.
<!-- jQuery -->
<script src="https://code.jquery.com/jquery-3.4.1.min.js"></script>
<!-- Bootstrap CSS -->
<link rel='stylesheet' href='https://cdnjs.cloudflare.com/ajax/libs/twitter-bootstrap/4.1.3/css/bootstrap.min.css'>
<!-- Bootstrap JS -->
<script src="https://cdnjs.cloudflare.com/ajax/libs/twitter-bootstrap/4.3.1/js/bootstrap.min.js"></script>
<!-- blueimp Gallery script -->
<script src="https://blueimp.github.io/Gallery/js/jquery.blueimp-gallery.min.js"></script>
2. Now, also include File Upload plugin’s CSS and JavaScript files.
    <!-- CSS to style the file input field as button and adjust the Bootstrap progress bars -->
    <link rel="stylesheet" href="css/jquery.fileupload.css" />
    <link rel="stylesheet" href="css/jquery.fileupload-ui.css" />
    <script src="js/jquery.iframe-transport.js"></script>
    <!-- The basic File Upload plugin -->
    <script src="js/jquery.fileupload.js"></script>
    <!-- The File Upload processing plugin -->
    <script src="js/jquery.fileupload-process.js"></script>
    <!-- The File Upload image preview & resize plugin -->
    <script src="js/jquery.fileupload-image.js"></script>
    <!-- The File Upload audio preview plugin -->
    <script src="js/jquery.fileupload-audio.js"></script>
    <!-- The File Upload video preview plugin -->
    <script src="js/jquery.fileupload-video.js"></script>
    <!-- The File Upload validation plugin -->
    <script src="js/jquery.fileupload-validate.js"></script>
    <!-- The File Upload user interface plugin -->
    <script src="js/jquery.fileupload-ui.js"></script>
    <!-- The main application script -->
    <script src="js/demo.js"></script>
3. After loading all necessary assets, create a basic HTML structure for file upload interface like below:
        <form
        id="fileupload"
        action="https://jquery-file-upload.appspot.com/"
        method="POST"
        enctype="multipart/form-data">
        <!-- Redirect browsers with JavaScript disabled to the origin page -->
        <noscript
          ><input
            type="hidden"
            name="redirect"
            value="https://blueimp.github.io/jQuery-File-Upload/"
        /></noscript>
        <!-- The fileupload-buttonbar contains buttons to add/delete files and start/cancel the upload -->
        <div class="row fileupload-buttonbar">
          <div class="col-lg-7">
            <!-- The fileinput-button span is used to style the file input field as button -->
            <span class="btn btn-success fileinput-button">
              <i class="glyphicon glyphicon-plus"></i>
              <span>Add files...</span>
              <input type="file" name="files[]" multiple />
            </span>
            <button type="submit" class="btn btn-primary start">
              <i class="glyphicon glyphicon-upload"></i>
              <span>Start upload</span>
            </button>
            <button type="reset" class="btn btn-warning cancel">
              <i class="glyphicon glyphicon-ban-circle"></i>
              <span>Cancel upload</span>
            </button>
            <button type="button" class="btn btn-danger delete">
              <i class="glyphicon glyphicon-trash"></i>
              <span>Delete selected</span>
            </button>
            <input type="checkbox" class="toggle" />
            <!-- The global file processing state -->
            <span class="fileupload-process"></span>
          </div>
          <!-- The global progress state -->
          <div class="col-lg-5 fileupload-progress fade">
            <!-- The global progress bar -->
            <div
              class="progress progress-striped active"
              role="progressbar"
              aria-valuemin="0"
              aria-valuemax="100"
            >
              <div
                class="progress-bar progress-bar-success"
                style="width:0%;"
              ></div>
            </div>
            <!-- The extended global progress state -->
            <div class="progress-extended"> </div>
          </div>
        </div>
        <!-- The table listing the files available for upload/download -->
        <table role="presentation" class="table table-striped">
          <tbody class="files"></tbody>
        </table>
      </form>
4. Finally, active jQuery multiple file upload with progress bar application by adding the following x-tmpl script.
          <!-- The template to display files available for upload -->
    <script id="template-upload" type="text/x-tmpl">
      {% for (var i=0, file; file=o.files[i]; i++) { %}
          <tr class="template-upload fade">
              <td>
                  <span class="preview"></span>
              </td>
              <td>
                  {% if (window.innerWidth > 480 || !o.options.loadImageFileTypes.test(file.type)) { %}
                      <p class="name">{%=file.name%}</p>
                  {% } %}
                  <strong class="error text-danger"></strong>
              </td>
              <td>
                  <p class="size">Processing...</p>
                  <div class="progress progress-striped active" role="progressbar" aria-valuemin="0" aria-valuemax="100" aria-valuenow="0"><div class="progress-bar progress-bar-success" style="width:0%;"></div></div>
              </td>
              <td>
                  {% if (!o.options.autoUpload && o.options.edit && o.options.loadImageFileTypes.test(file.type)) { %}
                    <button class="btn btn-success edit" data-index="{%=i%}" disabled>
                        <i class="glyphicon glyphicon-edit"></i>
                        <span>Edit</span>
                    </button>
                  {% } %}
                  {% if (!i && !o.options.autoUpload) { %}
                      <button class="btn btn-primary start" disabled>
                          <i class="glyphicon glyphicon-upload"></i>
                          <span>Start</span>
                      </button>
                  {% } %}
                  {% if (!i) { %}
                      <button class="btn btn-warning cancel">
                          <i class="glyphicon glyphicon-ban-circle"></i>
                          <span>Cancel</span>
                      </button>
                  {% } %}
              </td>
          </tr>
      {% } %}
    </script>
    <!-- The template to display files available for download -->
    <script id="template-download" type="text/x-tmpl">
      {% for (var i=0, file; file=o.files[i]; i++) { %}
          <tr class="template-download fade">
              <td>
                  <span class="preview">
                      {% if (file.thumbnailUrl) { %}
                          <a href="{%=file.url%}" title="{%=file.name%}" download="{%=file.name%}" data-gallery><img src="{%=file.thumbnailUrl%}"></a>
                      {% } %}
                  </span>
              </td>
              <td>
                  {% if (window.innerWidth > 480 || !file.thumbnailUrl) { %}
                      <p class="name">
                          {% if (file.url) { %}
                              <a href="{%=file.url%}" title="{%=file.name%}" download="{%=file.name%}" {%=file.thumbnailUrl?'data-gallery':''%}>{%=file.name%}</a>
                          {% } else { %}
                              <span>{%=file.name%}</span>
                          {% } %}
                      </p>
                  {% } %}
                  {% if (file.error) { %}
                      <div><span class="label label-danger">Error</span> {%=file.error%}</div>
                  {% } %}
              </td>
              <td>
                  <span class="size">{%=o.formatFileSize(file.size)%}</span>
              </td>
              <td>
                  {% if (file.deleteUrl) { %}
                      <button class="btn btn-danger delete" data-type="{%=file.deleteType%}" data-url="{%=file.deleteUrl%}"{% if (file.deleteWithCredentials) { %} data-xhr-fields='{"withCredentials":true}'{% } %}>
                          <i class="glyphicon glyphicon-trash"></i>
                          <span>Delete</span>
                      </button>
                      <input type="checkbox" name="delete" value="1" class="toggle">
                  {% } else { %}
                      <button class="btn btn-warning cancel">
                          <i class="glyphicon glyphicon-ban-circle"></i>
                          <span>Cancel</span>
                      </button>
                  {% } %}
              </td>
          </tr>
      {% } %}
    </script>
Changelog
-
10/24/2019
- Run workflow on push and pull_request.
- Run mocha tests via Docker.
- Add end-to-end tests using blueimp/wdio.
09/01/2019
07/05/2019
Advance Configuration Options
[site_reviews assigned_to=”post_id”]
Submit Your Review
[site_reviews_form assign_to=”post_id”]
Similar Code Snippets:

I code and create web elements for amazing people around the world. I like work with new people. New people new Experiences.
I truly enjoy what I’m doing, which makes me more passionate about web development and coding. I am always ready to do challenging tasks whether it is about creating a custom CMS from scratch or customizing an existing system.


